
Any time you visit a website, there needs to be a way for that site to receive information from your web browser. The most common method for that transfer is HTTP (Hyper Text Transfer Protocol), a common set of rules and instructions that standardized the process.
Unsurprisingly, the ‘S’ in HTTPS stands for ‘secure’, meaning all data and communication between your web browser and the website you are visiting is encrypted and therefore secure.
In an age where personal information is spread across numerous websites and accounts, HTTPS technology provides an invaluable service to users and site-builders. Without it, there’d be no feasible way to feel comfortable taking advantage of things like Amazon, online banking, or even email.
Download the HTTP to HTTPS Migration Checklist now or jump to the on-page version.
So, How Does HTTPS Keep Information Secure?
Essentially, HTTPS provides three layers of protection:
Encrypted Data
Encrypted information can only be read by having a secret key, or password that allows you to decode it. Without the proper key, any intercepted information is meaningless. This adds protection and is the most effective way of transmitting information securely.
Integrity
This provides a secure platform ensuring an unwanted third party has not tampered with data that is transmitted. Information cannot be corrupted without being detected.
Authenticity
This verifies your users are only communicating with your website. No information is being intercepted. Secure Sockets Layer (SSL) provides authentication that keeps your users information safe.
What’s an SSL?
An SSL (Secure Sockets Layer) is a data file that initiates a secure browsing session for your user. This allows for a private connection between your site, and your customers. You need an SSL certificate to use HTTPS and display the padlock (secure) in the address bar of your site.
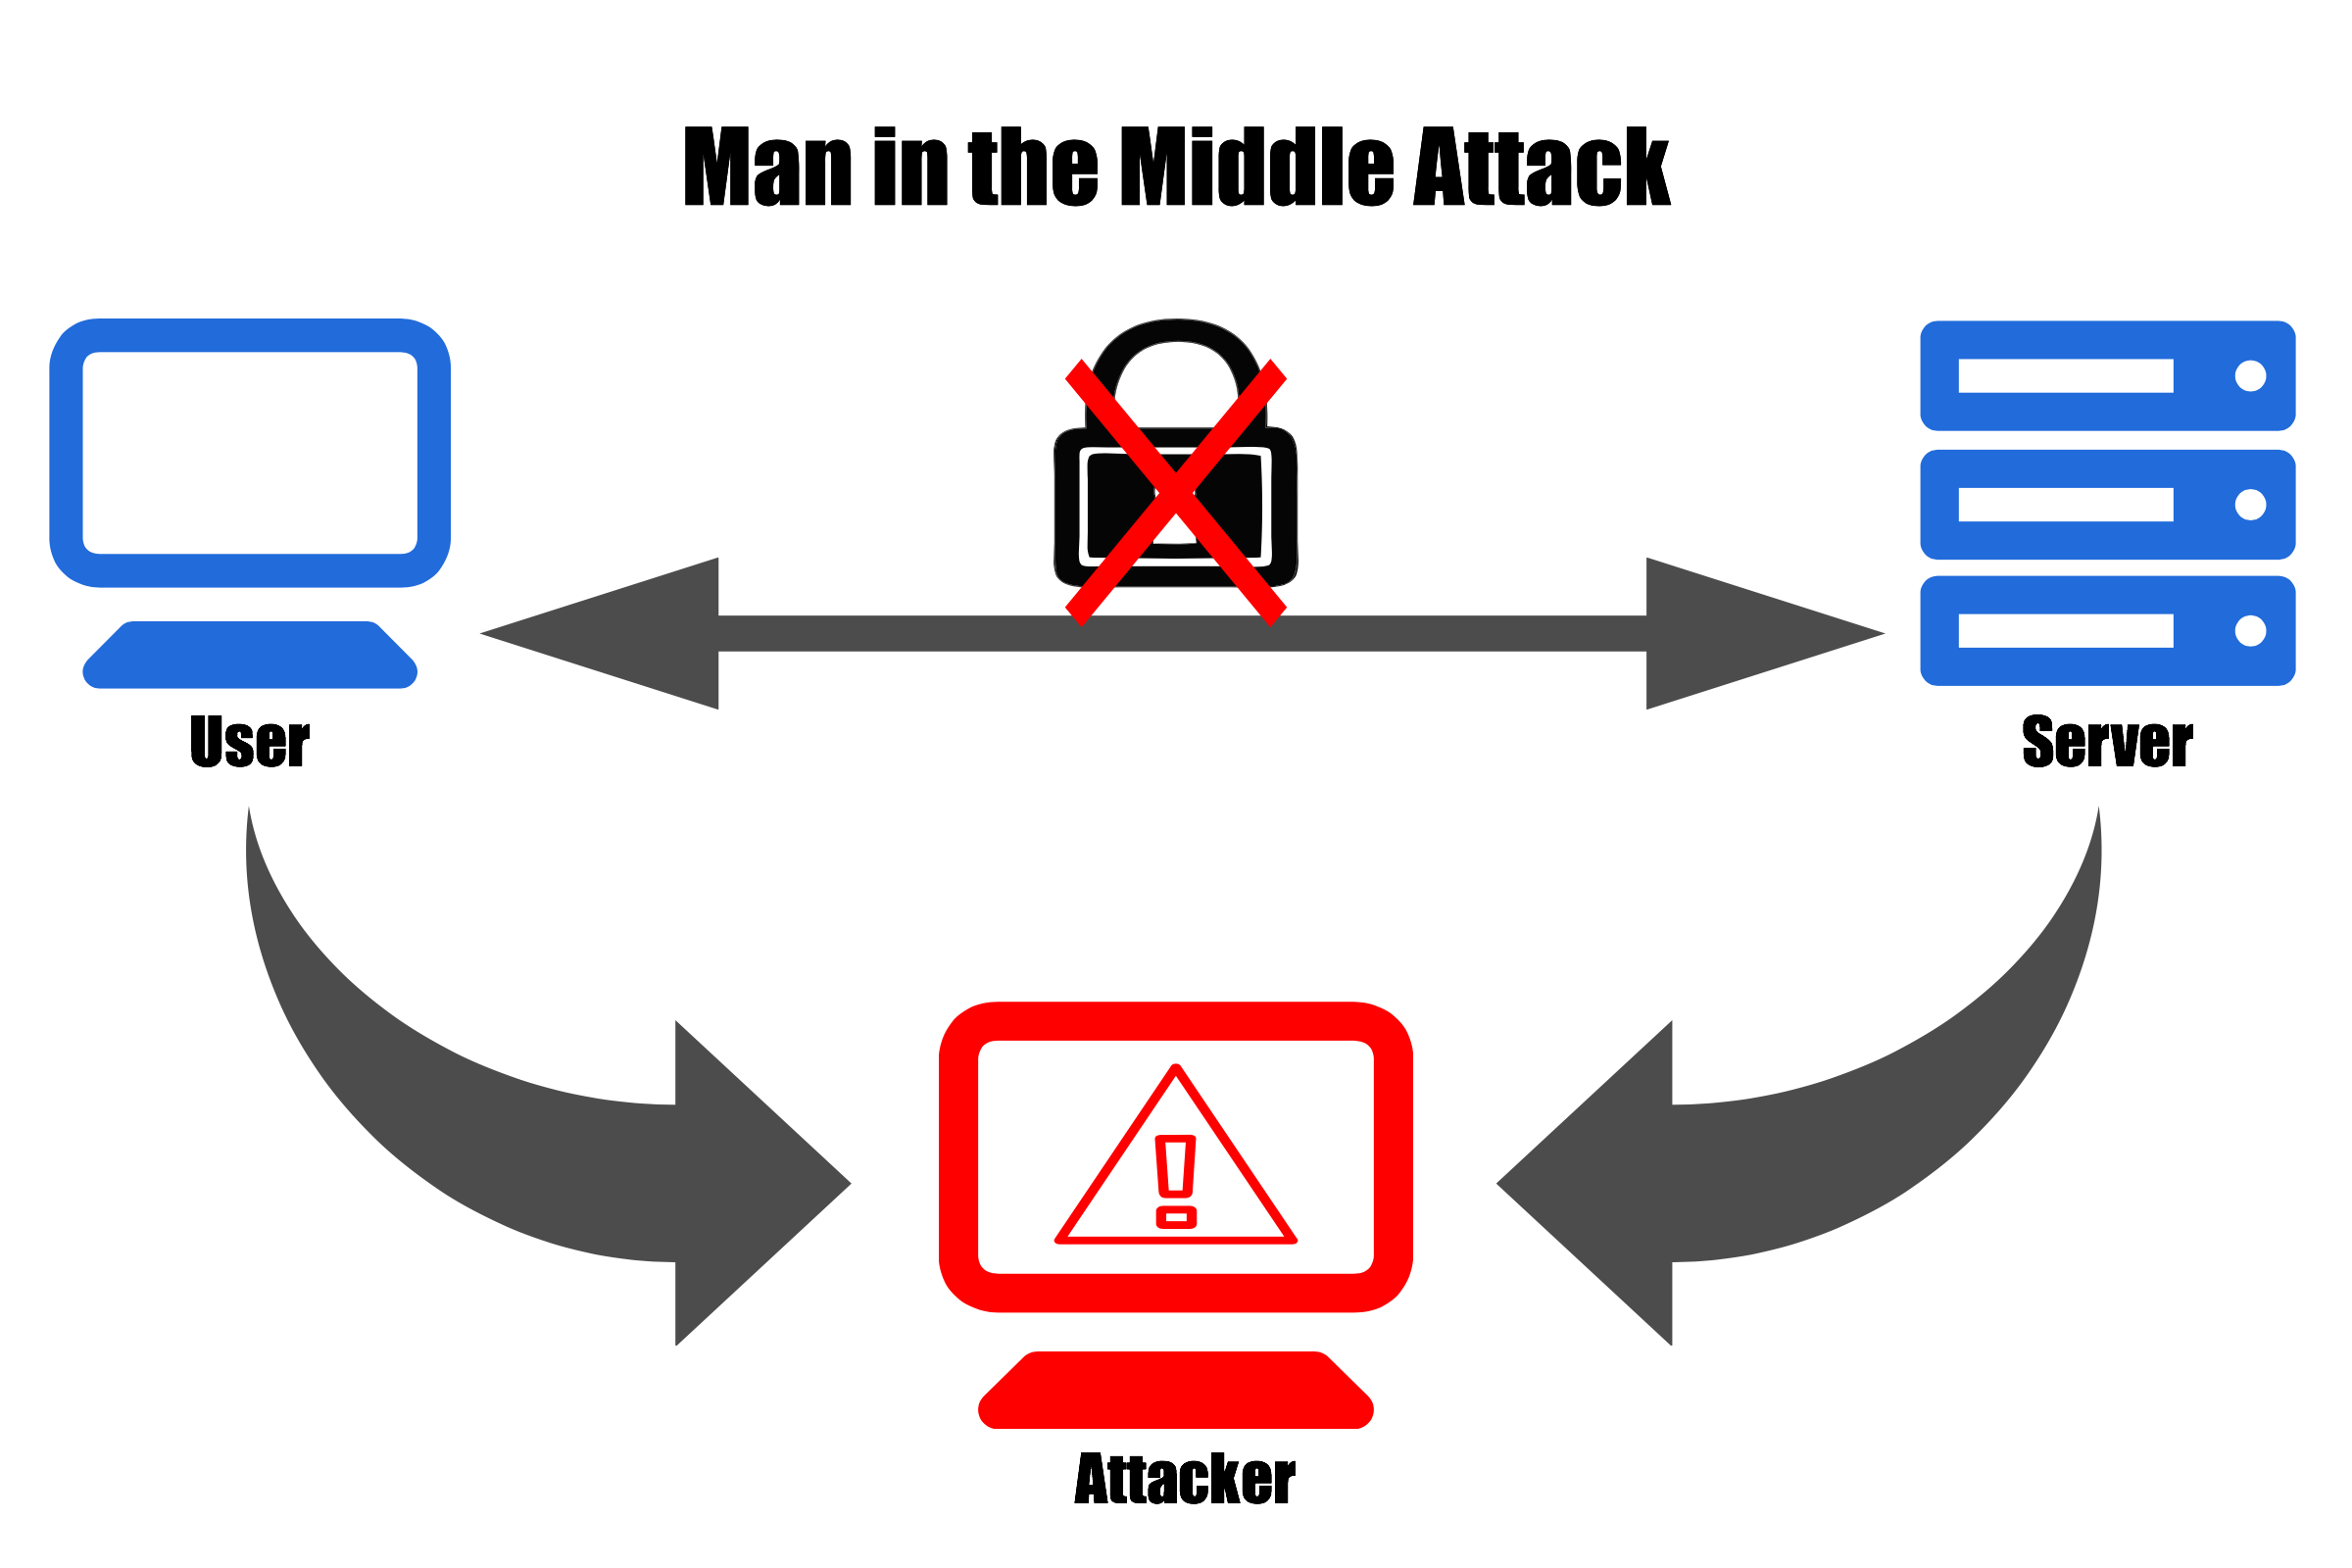
SSLs add authenticity to communication and prevent “man in the middle” attacks. This is when an attacker tricks the user into thinking they are directly sending data to a website, when in reality they are sending information to a scammer, or “middle man”.
Why Make The Switch To HTTPS?
HTTPS provides a more secure browsing experience for your customers. However, switching to secure version of your site is a lot more involved than one might think (more on that in a bit).
Also, moving to HTTPS is smart for SEO purposes. Google has confirmed HTTPS is a ranking signal, stating they are “working to make the internet safer.” Although it is worth noting that with over 200 ranking signals involved in Google’s algorithm, HTTPS isn’t one of the most important, but it certainly constitutes a step in the right direction. After all, the core of Google’s algorithm is positive user experience, and security is certainly in the user’s best interest.
In the future, expect to see HTTPS on all sites whether they are collecting personal information or not.
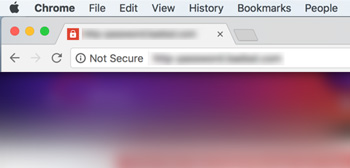
“Not Secure” Warning In Google Chrome
Beginning last month, the latest version of Google Chrome, Chrome 56, a browser used by roughly 57% of all users, started displaying a “Not Secure” warning, on all sites that contain password and credit card input fields.
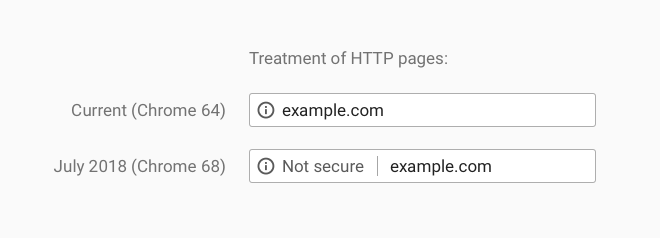
Google further stated that, “Eventually, Chrome will show a ‘Not Secure’ warning for all pages served over HTTP, regardless of whether or not the page contains sensitive input fields,” adding, “you should plan to migrate your site to use HTTPS for all pages.”
It should come as no surprise that Google is promoting security. Adding a visual cue to the browser demonstrates they are taking the consumer’s security seriously and is a step towards HTTPS becoming ubiquitous across the web.
Update: In July 2018, Google’s Chrome browser will label ALL non-HTTPS website as ‘not secure’
Making The Switch To HTTPS
The process of properly switching to a secure site is involved. Google treats a migration from HTTP to HTTPS as a “site move with a URL change,” meaning Google will treat the HTTPS URL structure as a new site. Proper preparation, implementation, and monitoring are required to mitigate any negative effects.
The checklist below will help you navigate through the migration and avoid many pitfalls that could cause your site’s traffic to decline.
Download the HTTP to HTTPS Migration Checklist now!
The HTTP to HTTPS Migration Checklist
Preparation:
-
Select an SSL certificate
-
Crawl your existing website to obtain a list of all URLs
-
Understand current state of your site
-
Crawl data will be used for comparison
-
Obtain access with sufficient privileges to all applicable accounts
-
Website Access
-
Google Analytics
-
Search Console
-
AdWords
-
Facebook
-
Twitter
-
Instagram
-
Pinterest
-
Google My Business
-
YouTube
-
Download a list of all 301 redirects currently in place
-
Update the 301 map with new HTTPS URLs to have ready to go upon launch
-
Download and update disavow file
-
Download any URL removal requests
-
If using a test server, you can update all absolute links to HTTPS prior to going live
Launch:
-
Install SSL Certificate
-
Update .htaccess file to force https (be sure to specify 301)
-
Replace all absolute links
-
Pages
-
Images
-
Stylesheets
-
Scripts
-
CDNs
-
Canonicals
-
Hreflang
-
Plugins
Post-Launch:
-
Import updated 301 redirects
-
Search Console:
-
Verify HTTPS versions of the website (www & non-www)
-
Submit new sitemap with HTTPS URLs
-
Update robots to include HTTPS sitemap location
-
Ensure that robots is not blocking any HTTPS content
-
Verify and set preferred domain
-
Submit updated sitemap with HTTPS URLs
-
Associate Google Analytics with preferred domain
-
Annotate the switch
-
Fetch, render, and submit URLs for indexing
-
Resubmit disavow file (if applicable)
-
Resubmit URL removal requests (if applicable)
-
Update Google Analytics to HTTPS version
-
Update (if applicable):
-
Structured data markup
-
PPC
-
Email campaigns
-
Additional scripts
-
Update URLs on all Social Media accounts
-
Check RSS feed is working (if applicable)
-
Run an HTTPS Validation Check
-
Crawl HTTPS version of site
-
Make sure nothing is broken and all links are working
-
Crawl the list of old URLs
-
They should all be 301 redirecting
-
Monitor rankings, Search Console, and Analytics over the next several weeks
Wrapping Up
HTTPS is rapidly becoming the standard and Google is pushing more than ever for websites to make the switch. If you’re planning on transitioning, careful planning and implementation is essential. Your site’s performance should be tracked after the conversion.
Nice and clear Paul, thanks!