What is Google Analytics?
The industry standard web analytics platform that tracks and reports data about your website. Using Google analytics properly will help you measure traffic, consumer engagement, campaigns and conversions.
Why you Need Google Analytics
If you have a website and are interesting in improving its performance, then you need Google analytics. This free software is an entryway into understand your website, and how to leverage its performance to grow to your business.
What Information can Google Analytics (GA) Provide?
Google analytics provides a wealth of information about your website, and its visitors. Analytics can help answer many questions to help improve your sites performance like:
- How many people are visiting my site?
- Which pages of my site are most popular?
- Where are my users located?
- What types of traffic are most profitable?
- What sites are referring traffic to my site?
- How often do visitors return to my site?
- What kind of devices are visitors using to access my site?
These are some basic metrics that Google Analytics can answer, but when you really start digging into the data, you’ll find it’s capable of much more!
For now, we’ll keep things simple and explore how to get started with Google Analytics. Next we’ll learn how to setup an Analytics account.
Setting up a Google Analytics Account
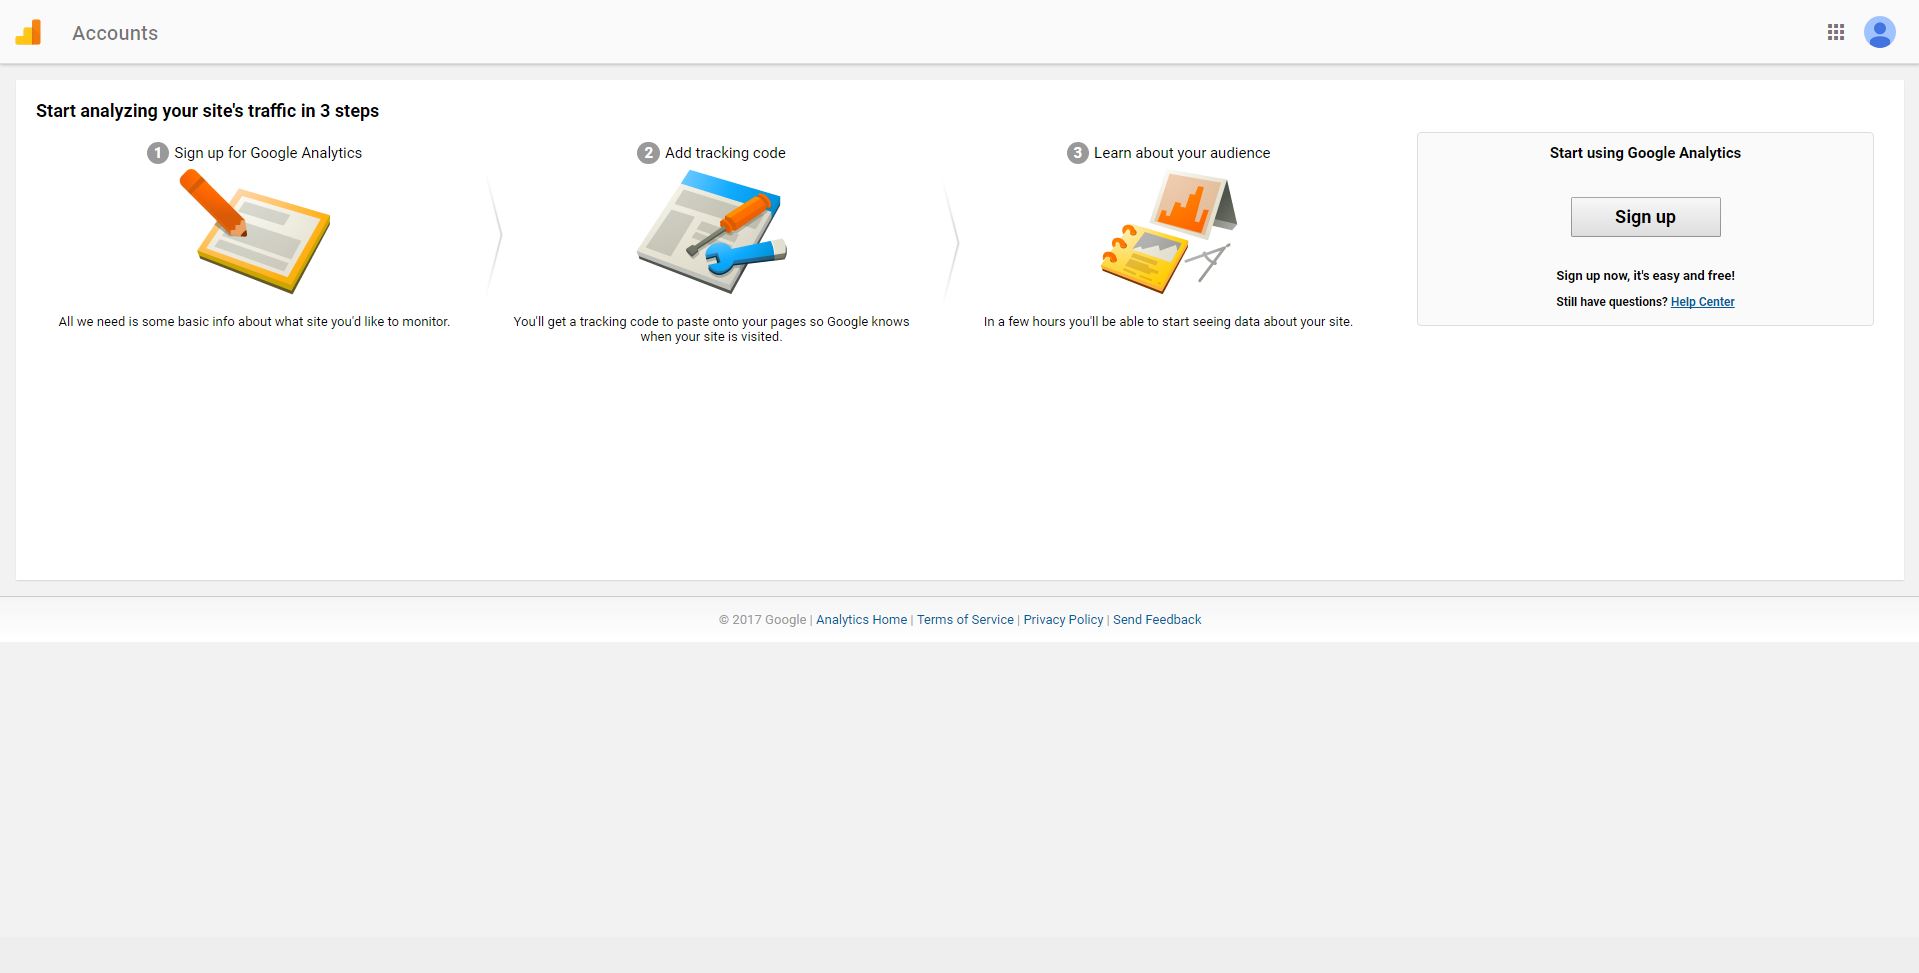
To get started with Analytics you will first need a Google Account. After creating a Google account you can visit analytics.google.com to sign up.
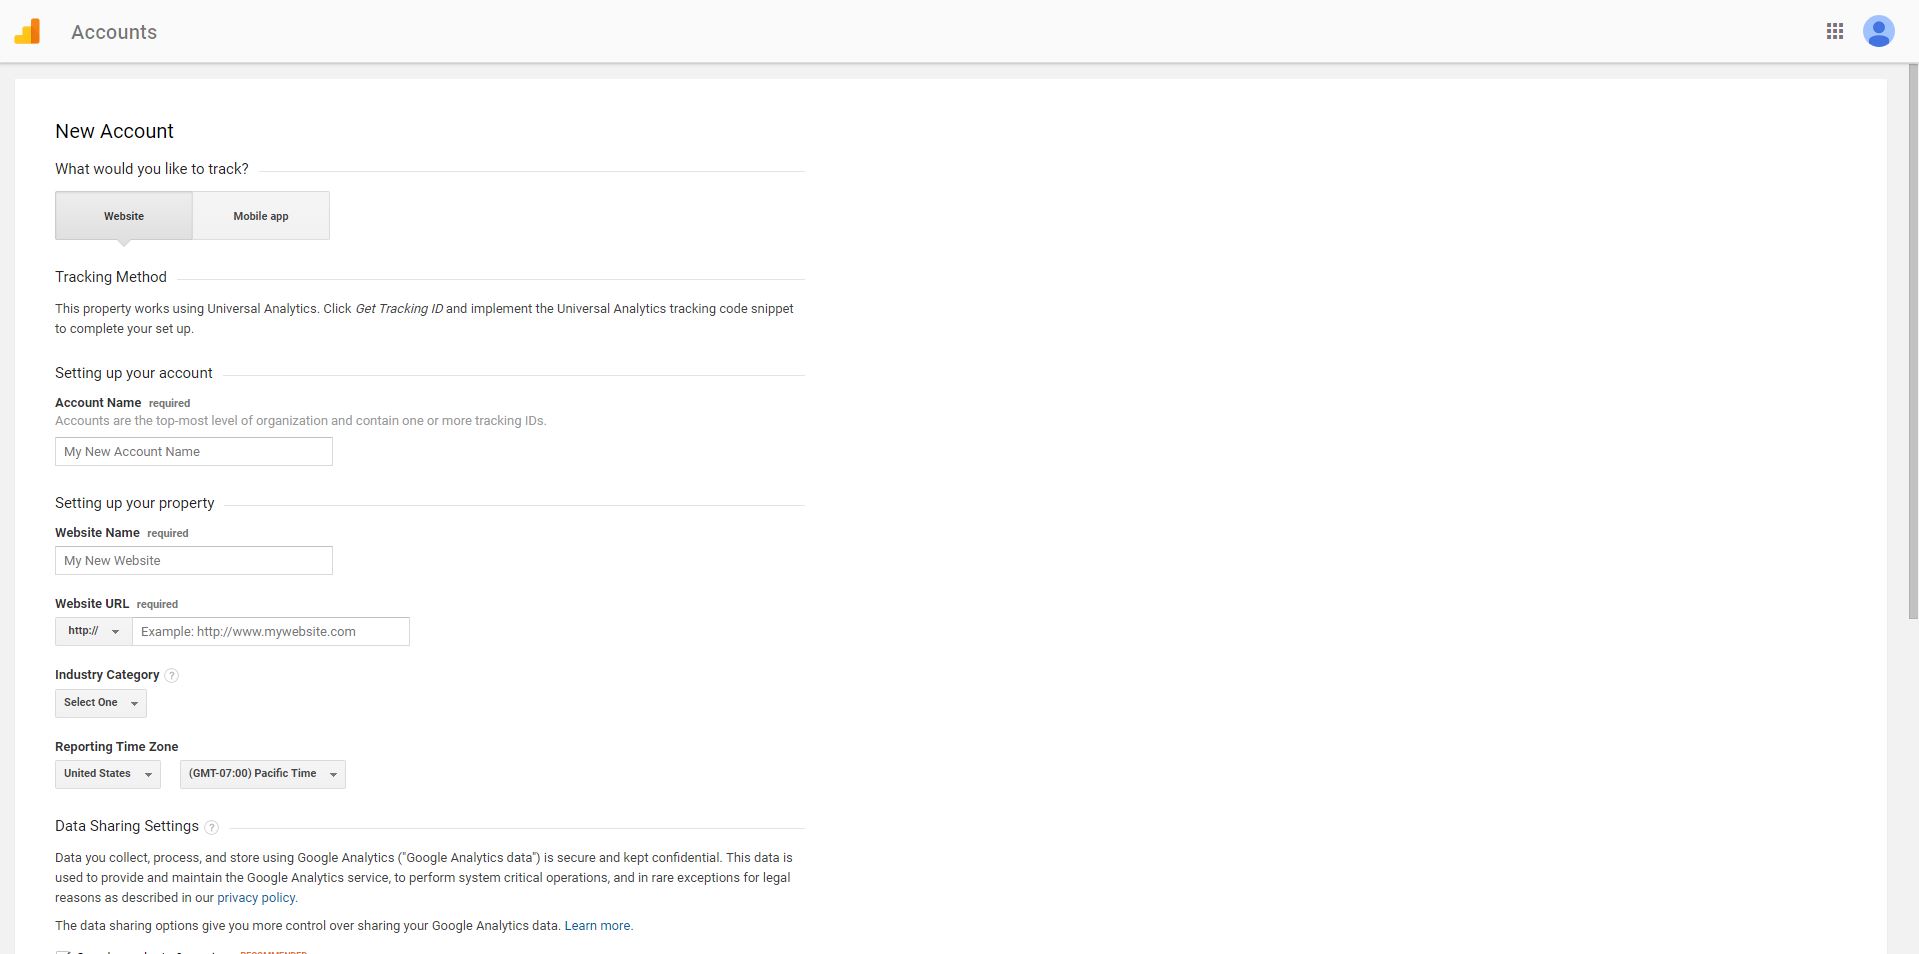
Click the sign up button and you will be asked to enter some information regarding your website. This guide will focus on setting up Google Analytics for a website (not a mobile app).
Account Name:
→ Enter your business name or the name of your parent company. If you have multiple businesses, keeping an organized account structure will make life much easier in the future as you rely on data for making marketing decision.
Website Name:
→ Name of your website (Example Business Name)
Website URL:
→ The URL of your website (www.examplebusinessurl.com)
Industry Category:
→ Select an industry category that represents your business. This allows for more tailored reporting.
Reporting Time Zone:
→ Select the appropriate time zone for accurate reporting based on your time zone
→ Select which data (if any) you would like to share with Google.
Account Structure
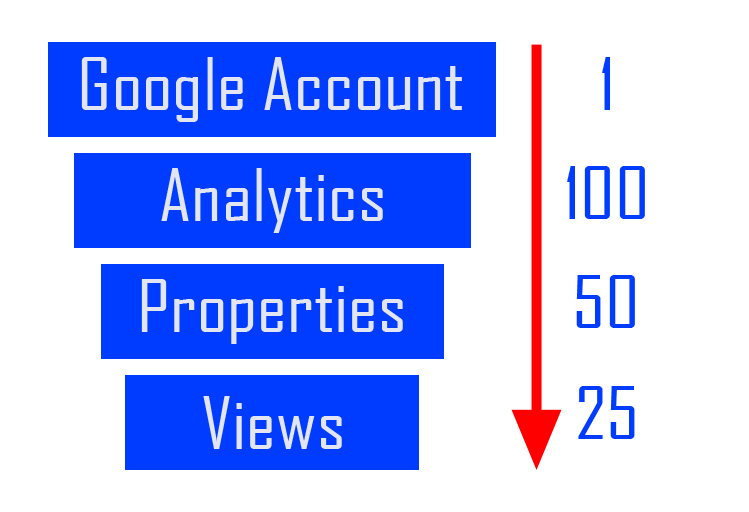
Within a single Google Account you can have:
- 100 Analytics Accounts
- 50 Website properties under each analytics account
- 25 views under each website property
Create Additional Views
By default, Analytics will create an “All Web Site Data” view, which serves as ‘raw’ view that contains unfiltered data.
Creating additional views within Google Analytics allows you to filter unwanted traffic. For our basic setup, we will create two additional views, ‘Filtered’ and ‘Sandbox’.
- The Filtered view will block unwanted traffic sources from skewing our data
- The Sandbox view will serve as a test view to experiment in the future
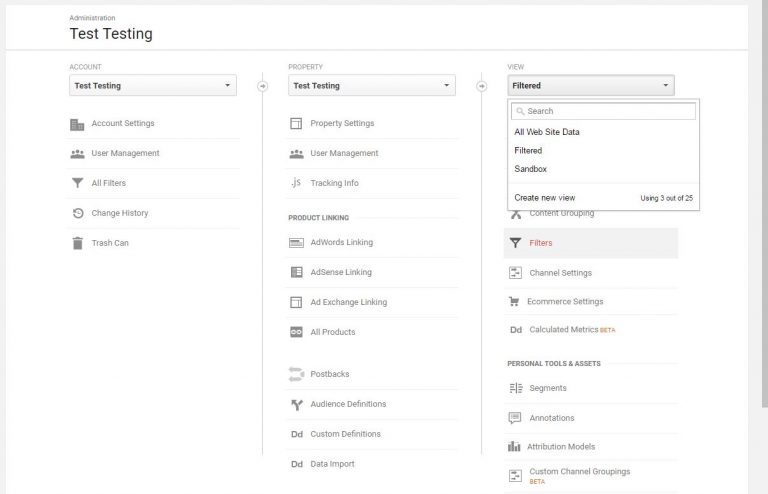
Adding a View
Navigate to:
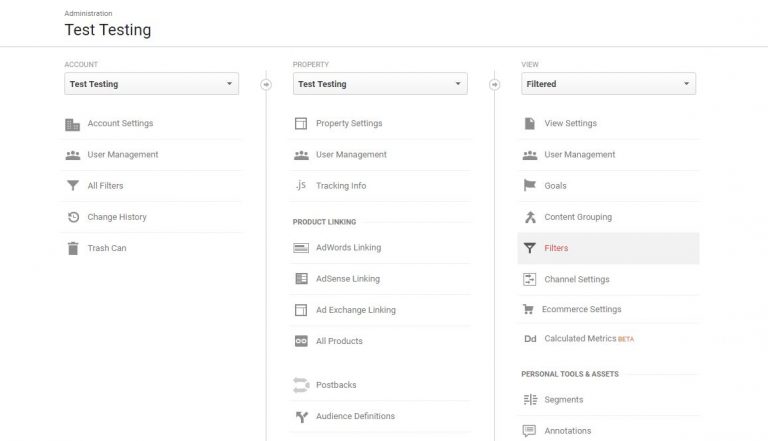
Admin >> Views Column Drop Down >> Create New View >> Create two new views, named “Filtered” and “Sandbox”.
Add a Filter
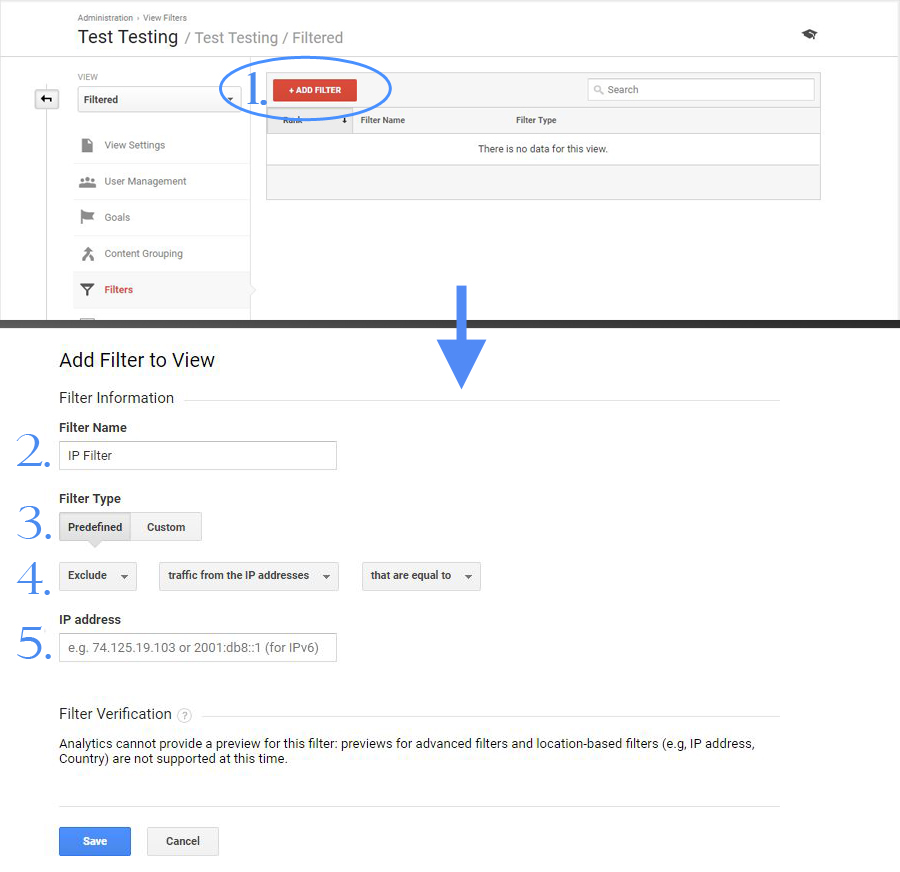
In the Filtered View select Filters
- Click “+Add Filter”
- Then Enter a Filter Name
- Select Predefined Filter Type
- Exclude > Traffic from the IP addresses > that are equal to
- Enter your IP address
If you are unsure of your IP address, you can Google search “what is my IP” to find out.
Now that setup is complete, we are ready to implement Google Analytics on the website.
How to Install GA Tracking Script
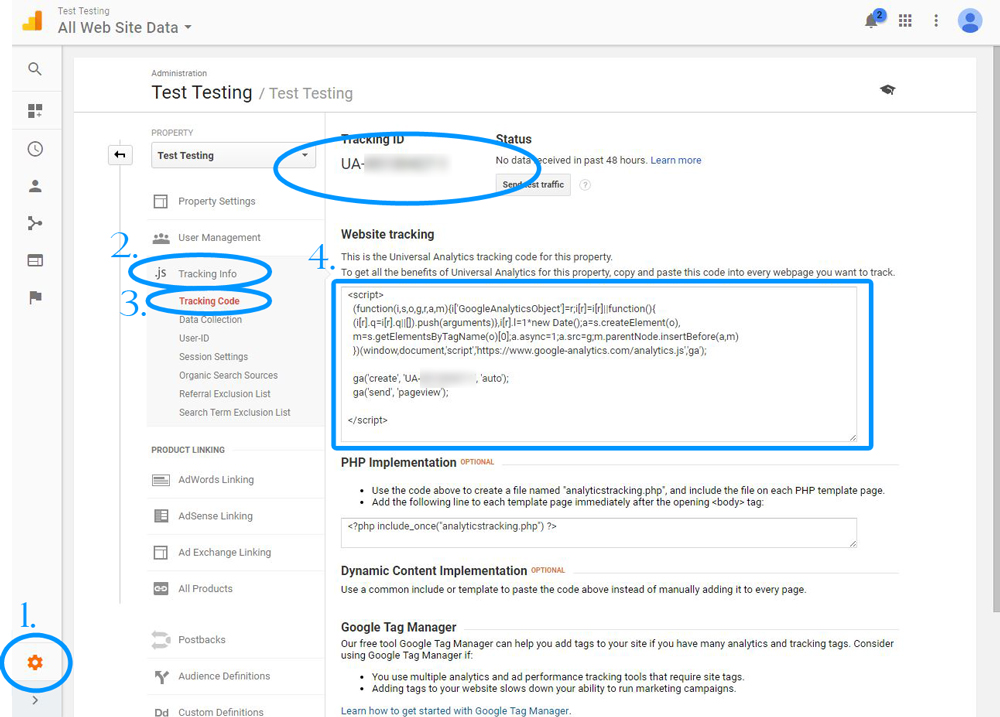
Navigate to your Tracking ID
- Admin
- Tracking Info
- Tracking Code
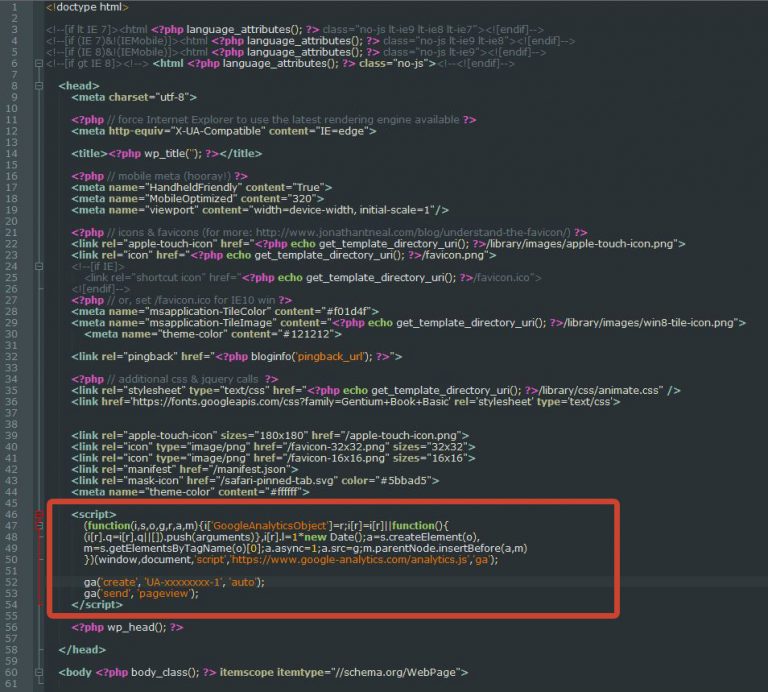
This code must be installed on every page of your website. The installation method will vary depending on the type of website you have (WordPress, Shopify, Squarespace). First we’ll look at WordPress installation here.
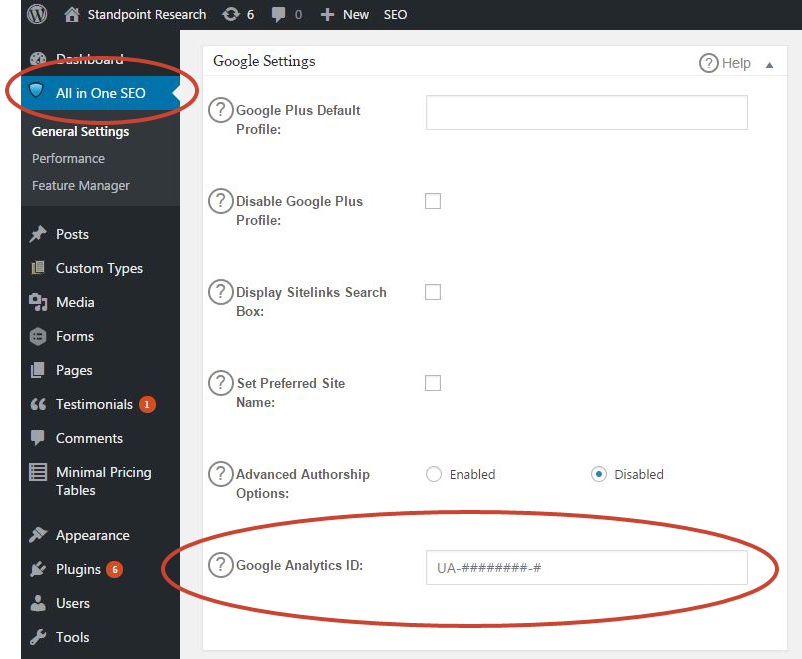
Plugins like All in One SEO make installing Google Analytics on your site a breeze. After installing the All In One SEO Plugin navigate to the Google Settings section, and enter your unique UA code.
If your site is using FTP, or you elect to not use a plugin, you can enter the full JavaScript snippet into the <head> section of your site.
Verify That Analytics is Tracking
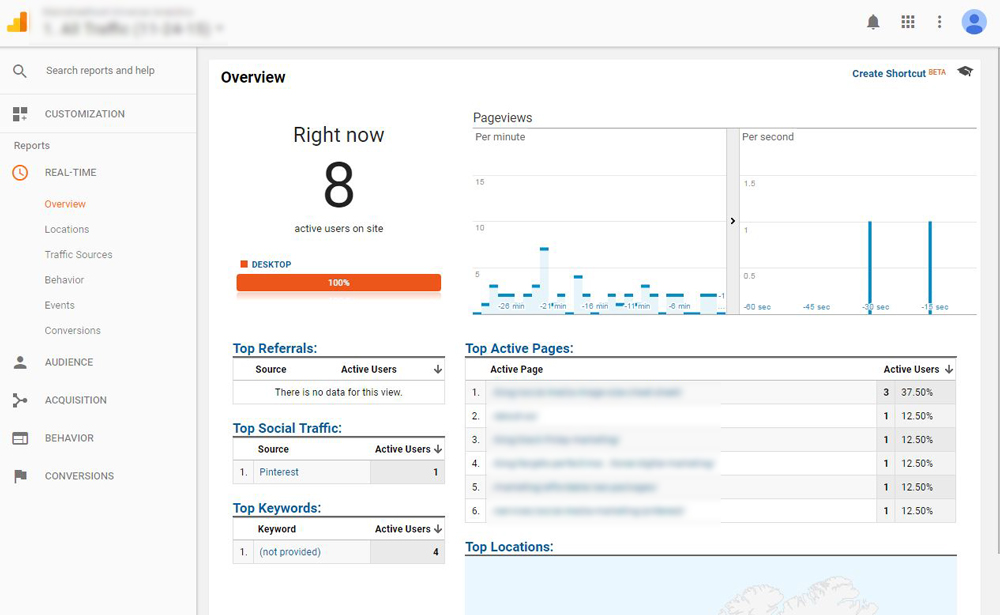
After your analytics code is on your site, you must check to ensure the codes is actually tracking visitors to your site. You can quickly do this by checking real time tracking within Google Analytics.
Real-Time >> Overview
Navigate to a few pages to make sure analytics is tracking. Another friendly tool to check your entire site for the analytics codes is gachecker.com. This website will scan your site and notify you of all pages that are missing the analytics tracking code.
In a standard Analytics account the data take roughly 24 hours to display within reports. So check back the next day to ensure your data has populated in all three of the views we created.


